- By Admin
- Floor
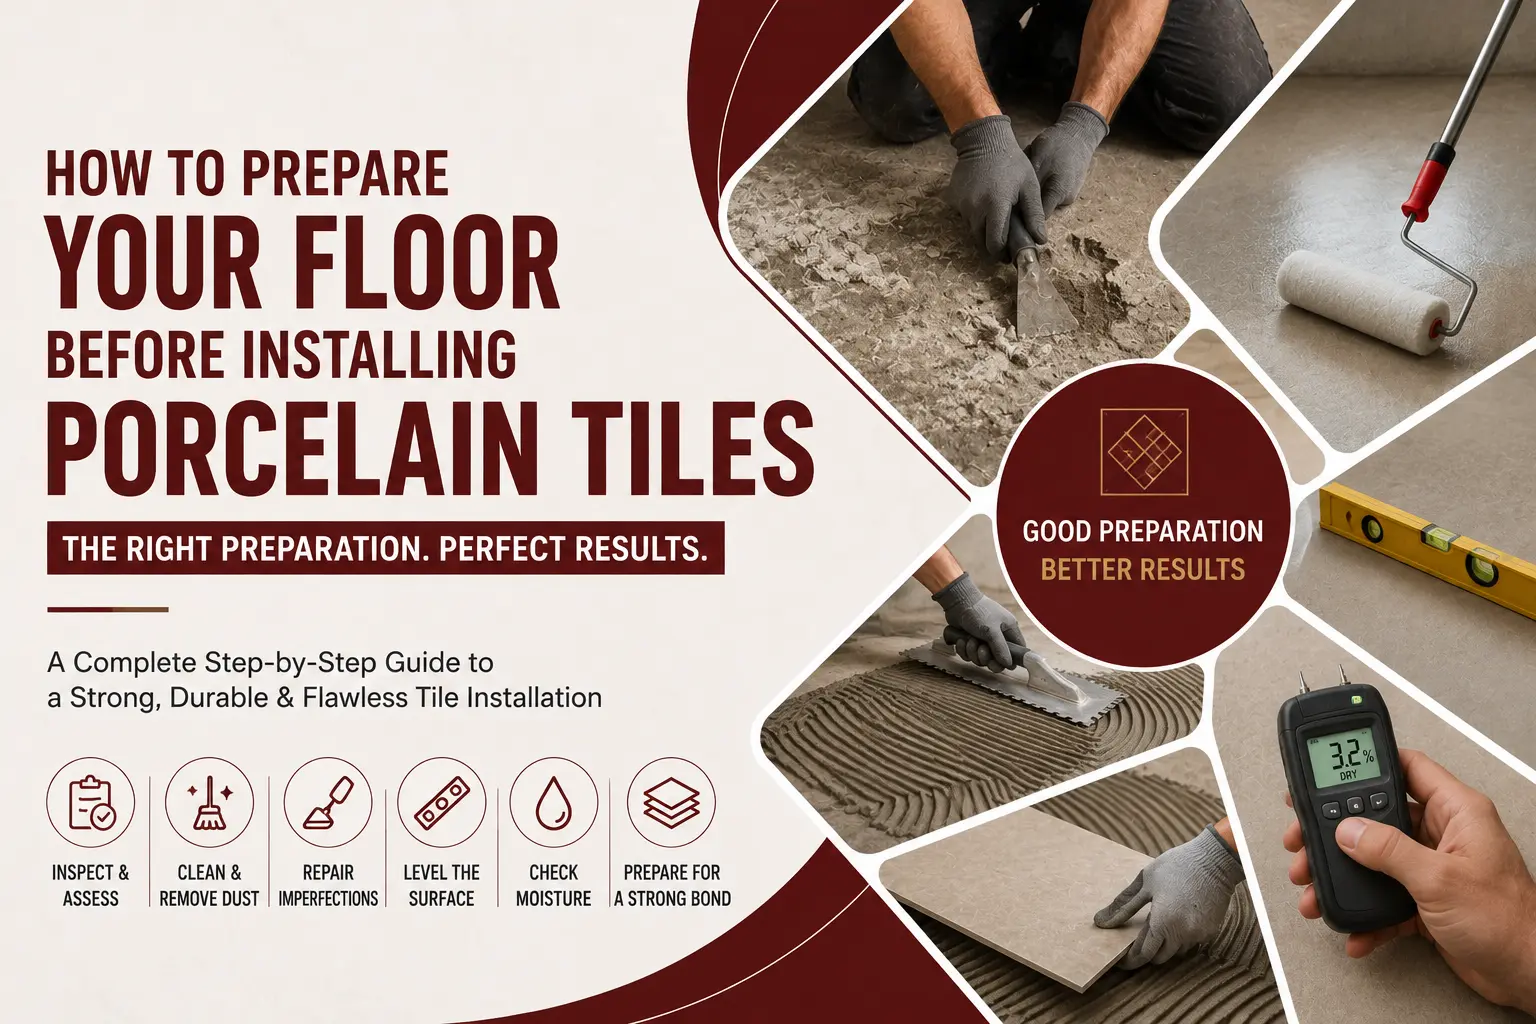
How to Prepare Your Floor Before Installing Porcelain Tiles
Installing porcelain tiles is not simply a matter of choosing the right tile, applying adhesive and laying it on the floor. The condition of the floor underneath the tiles plays a major role in the durability, appearance and performance of the finished surface.
A poorly prepared substrate can lead to cracked tiles, hollow sounds, uneven surfaces, loose tiles, failed grout joints and moisture-related problems. Proper preparation gives the adhesive a stable surface to bond to and helps the porcelain tiles perform as intended.
For projects in Dubai, preparation deserves particular attention because indoor and outdoor installations can face high temperatures, direct sunlight, humidity and demanding usage conditions.
In this guide, we explain how to prepare a floor before installing porcelain tiles, from inspecting the existing surface to cleaning, repairing, levelling, checking moisture and preparing the substrate for adhesive.
Why Floor Preparation Matters Before Porcelain Tile Installation
Porcelain tiles have very low water absorption and are manufactured to provide a hard, durable surface. However, the strength of the tile itself cannot compensate for a weak or poorly prepared substrate.
The tile installation system essentially works as:
Existing floor → prepared substrate → adhesive → porcelain tile → grout
If the substrate is unstable, contaminated, excessively uneven or unsuitable, problems can develop even when high-quality porcelain tiles are used.
Professional substrate-preparation guidance recommends that the surface receiving tile should be structurally sound, stable, dry and clean, without materials that could interfere with adhesion.
Common problems caused by poor preparation
Problem | Possible Cause |
Loose tiles | Poor adhesive bond or contaminated substrate |
Cracked tiles | Movement, weak substrate or unsupported areas |
Hollow-sounding tiles | Insufficient adhesive contact |
Uneven tile surface | Poor substrate flatness or inconsistent adhesive application |
Cracked grout | Substrate movement or inadequate joints |
Moisture problems | Damp substrate or inadequate waterproofing |
Tile lippage | Uneven substrate or installation technique |
Adhesive failure | Dust, oil, paint, wax or other contaminants |
This is why floor preparation should be treated as part of the tile installation system rather than an optional preliminary step.
Step-by-Step: How to Prepare Your Floor for Porcelain Tiles
1. Identify the Existing Floor Type
The first step is to determine what surface the porcelain tiles will be installed over.
Common substrates include:
Concrete
Cement screed
Existing ceramic tiles
Existing porcelain tiles
Stone surfaces
Cement-based floors
Self-levelling compounds
Other approved substrates
The preparation method depends heavily on the substrate.
For example, a new concrete floor requires curing and moisture considerations, while an existing tiled floor requires checks for loose tiles, contamination and adequate adhesion.
Before starting, identify:
What material is underneath?
Is the substrate structurally sound?
Is it sufficiently dry?
Are there cracks?
Is it level or sufficiently flat?
Are there loose areas?
Is there existing waterproofing?
Are there contaminants on the surface?
2. Remove the Existing Flooring When Necessary
If the existing flooring is badly damaged, unstable or unsuitable for receiving porcelain tiles, it may need to be removed.
Do not assume that new porcelain tiles can simply be installed over every existing floor.
Existing ceramic or porcelain tiles can sometimes be used as a substrate, but they should be firmly bonded and free from dust, grease, oil, wax, paint, sealers and other substances that can interfere with adhesion.
Remove existing flooring when you find:
Loose tiles
Severely cracked tiles
Hollow or debonded sections
Water-damaged substrate
Unstable flooring
Excessive height problems
Unsuitable floor coverings
Contamination that cannot be adequately removed
If only isolated areas are damaged, those sections may sometimes be repaired rather than removing the entire floor.
The correct approach should be determined by the installer after inspecting the substrate.
3. Check the Floor for Cracks and Structural Problems
Before levelling or applying adhesive, inspect the floor carefully.
Look for:
Cracks
Depressions
Holes
Broken screed
Weak concrete
Areas showing movement
Previous repair patches
Expansion or control joints
Small surface imperfections and structural movement are not the same problem.
A cosmetic surface defect may be repaired with an appropriate preparation product. A structural crack or moving substrate requires a more careful assessment.
Why this matters
Porcelain tiles are rigid. If the substrate moves significantly underneath them, that movement can transfer stress into:
The tile
Adhesive layer
Grout joints
Simply covering a structural problem with adhesive does not solve the underlying cause.
For larger projects, particularly commercial or high-traffic installations, substrate stability should be assessed before proceeding.
4. Make Sure the Floor Is Flat
Flatness is one of the most important preparation requirements for porcelain tile installation.
This becomes even more important when using:
Large-format porcelain tiles
Rectified porcelain tiles
Long plank-style tiles
Thin porcelain slabs
Large-format floor tiles
A floor can be generally "level" but still have significant high and low spots.
Level vs flat
These terms are often confused.
Level means the surface is horizontally even relative to a reference plane.
Flat means the surface does not have excessive variations, bumps or depressions.
A floor may technically slope for drainage and still be sufficiently flat for tile installation.
A straightedge or appropriate measuring equipment can be used to identify high and low areas. Modern installation guidance also highlights straightedges and laser tools as useful methods for assessing substrate flatness.
5. Repair Low Spots and Uneven Areas
If the substrate has significant variations, correct them before laying porcelain tiles.
Depending on the situation, preparation may involve:
Patching compounds
Repair mortars
Smoothing compounds
Self-levelling products
Screed correction
Grinding high spots
The exact material should be compatible with the substrate and the planned tile adhesive system.
For example, MAPEI's installation guidance recommends using suitable smoothing or self-levelling materials when the substrate is out of flat or not at the required level.
Avoid using tile adhesive as a substitute for proper floor levelling
Trying to compensate for major floor variations by applying inconsistent thicknesses of adhesive can create installation problems.
The objective is to create a stable, suitably flat substrate before the adhesive is applied.
6. Check Concrete and Screed Curing
New concrete and screed should not automatically be tiled immediately after installation.
Cementitious substrates need sufficient time to cure and dry before receiving tile systems.
For example, one MAPEI porcelain-tile installation procedure specifies that new concrete should be cured for at least 28 days, while cement-based screeds need to be adequately cured and sufficiently dry before tiling.
The actual required curing and moisture conditions depend on:
Concrete type
Screed type
Thickness
Environmental conditions
Product specifications
Project requirements
Why curing matters
A substrate that continues to shrink or release significant moisture can place stress on the tile installation.
This can contribute to:
Cracking
Debonding
Adhesive problems
Grout problems
Moisture-related failures
For new construction, the tile installation schedule should therefore account for substrate curing.
7. Check Moisture Before Installing Porcelain Tiles
A floor may look dry on the surface while retaining moisture underneath.
This is particularly important for:
New concrete
New screed
Ground-floor installations
Bathrooms
Kitchens
Wet areas
Balconies
Terraces
The acceptable moisture level depends on the substrate, adhesive, waterproofing system and manufacturer's requirements.
For example, one MAPEI installation procedure specifies cementitious screeds should be sufficiently dry, with a moisture content below 5% for that particular installation system.
Do not apply one moisture limit to every project. Follow the requirements of the selected installation system and product manufacturer.
8. Remove Dust, Oil, Grease and Other Contaminants
This is one of the simplest steps—and one of the most commonly underestimated.
The substrate needs to provide a clean surface for the adhesive.
Remove:
Dust
Dirt
Oil
Grease
Wax
Paint
Loose particles
Curing compounds
Sealer residue
Construction debris
MAPEI's substrate guidance specifically identifies contaminants such as grease, oil, paint and wax as materials that need to be removed because they can interfere with bonding.
Cleaning process
Depending on the substrate, preparation can involve:
Mechanical cleaning
Scraping
Grinding
Vacuuming
Appropriate washing
Allowing the surface to dry
The surface should not simply look clean—it needs to be suitable for adhesive bonding.
9. Mechanically Profile Extremely Smooth Surfaces When Required
Some substrates are too smooth or dense to provide an adequate mechanical key.
In such situations, mechanical abrasion or a suitable primer may be required.
For example, MAPEI guidance notes that dense concrete finishes may require surface profiling before subsequent preparation layers are applied.
The exact method depends on the substrate and adhesive system.
Possible preparation methods include:
Mechanical abrasion
Grinding
Shot blasting
Suitable primer
Bonding primer
Surface treatment recommended by the adhesive manufacturer
Do not randomly apply a primer without checking compatibility with the adhesive and substrate.
10. Prepare Existing Tile Floors Carefully
Installing new porcelain tiles over existing tiles can sometimes be possible.
However, the existing tiles need to be inspected first.
Check for:
Loose tiles
Cracked tiles
Hollow areas
Poor adhesion
Grease
Wax
Sealers
Soap residue
Dust
Uneven surfaces
Existing ceramic and porcelain surfaces may need mechanical roughening and suitable priming before installation, depending on the system.
Any loose or damaged tiles should be dealt with before installing the new floor.
Remember the additional height
Installing porcelain over an existing floor also increases the finished floor height.
This can affect:
Doors
Skirting
Thresholds
Stair levels
Drainage
Adjacent rooms
Kitchen units
Bathroom fixtures
This should be checked before installation begins.
11. Check Waterproofing in Wet Areas
Bathrooms, shower areas, kitchens, balconies and other moisture-exposed locations require additional consideration.
Porcelain itself has very low water absorption, but the tile is not the complete waterproofing system.
The substrate, waterproofing layer, drainage and joints all form part of the overall assembly.
A suitable waterproofing system may be required beneath tile finishes in areas exposed to water. MAPEI, for example, specifies waterproofing membranes for certain bathroom, shower, balcony, terrace and swimming-pool tile applications.
Before installing porcelain tiles in a wet area, check:
Waterproofing condition
Drainage
Falls/slopes
Corners
Penetrations
Pipe openings
Floor-to-wall junctions
Existing cracks
Compatibility between waterproofing and adhesive
Do not rely on grout alone to solve waterproofing problems.
12. Check Drainage and Floor Slope
Bathrooms, balconies, terraces and outdoor areas may require a designed slope toward drainage points.
A completely flat surface is not always the objective.
The important consideration is that the substrate provides the appropriate drainage geometry while remaining sufficiently flat for the selected tile format and installation system.
Before tiling, check:
Drain locations
Floor slope
Water flow direction
Low points
Door thresholds
Drainage channels
Tile layout around drains
Poor preparation around drains can cause standing water and difficult tile cuts.
13. Account for Dubai's Climate During Installation
Dubai's climate can create additional challenges during tile installation.
High temperatures, direct sunlight and dry conditions can affect the working time of cementitious adhesives.
MAPEI installation guidance specifically notes that direct sunlight, dry wind and high temperatures can significantly reduce adhesive open time under certain conditions.
Practical precautions
For Dubai projects:
Avoid leaving prepared surfaces exposed unnecessarily.
Protect materials from extreme heat.
Avoid installing on excessively hot surfaces without following the adhesive manufacturer's instructions.
Monitor adhesive open time.
Work in manageable sections.
Follow the manufacturer's temperature requirements.
Take additional care with outdoor installations.
For external floors, balconies and terraces, substrate preparation should also account for exposure, movement and moisture.
14. Check Expansion and Movement Joints
Large tiled surfaces need to accommodate movement.
Existing expansion and control joints in the substrate should not simply be covered with adhesive and porcelain tiles.
Installation guidance recommends providing movement joints in accordance with applicable tile installation standards and project requirements.
Movement joints may be particularly important in:
Large commercial floors
Outdoor areas
Long corridors
Large open-plan spaces
Areas exposed to temperature changes
Concrete substrates with movement joints
The location and design of movement joints should be determined as part of the installation system.
15. Select the Right Adhesive for Porcelain Tiles
Once the floor has been properly prepared, the next step is choosing an adhesive compatible with the porcelain tile and substrate.
Porcelain tiles have low water absorption, so using an adhesive designed for the specific tile and application is important.
Consider:
Tile size
Tile weight
Indoor or outdoor location
Floor or wall installation
Wet or dry environment
Traffic level
Substrate type
Temperature exposure
Existing tile installation
Large-format requirements
For large-format porcelain, the adhesive and installation technique become especially important.
For certain installations, back-buttering the tile can help achieve more complete adhesive coverage. MAPEI's guidance recommends back-buttering in applications such as large-format tiles, exterior installations and heavy-load conditions.
16. Check Adhesive Coverage During Installation
Good floor preparation does not guarantee a successful installation if adhesive coverage is poor.
The adhesive needs to establish adequate contact between the substrate and tile.
For one MAPEI adhesive system, the recommended contact is greater than 80% for interior applications and greater than 95% for exterior and wet applications, subject to the applicable installation requirements.
Installers can periodically lift a tile during installation to inspect adhesive coverage.
This is particularly valuable when installing:
Large-format porcelain
Outdoor porcelain
Heavy-duty floors
Wet-area tiles
Thin porcelain products
Floor Preparation Checklist Before Installing Porcelain Tiles
Use this checklist before starting the installation:
Check | Ready? |
Existing floor inspected | ☐ |
Substrate structurally sound | ☐ |
Loose areas removed | ☐ |
Cracks assessed and repaired where appropriate | ☐ |
High spots removed | ☐ |
Low spots corrected | ☐ |
Surface sufficiently flat | ☐ |
Concrete/screed adequately cured | ☐ |
Moisture checked | ☐ |
Dust removed | ☐ |
Oil and grease removed | ☐ |
Paint/wax/sealer contamination removed | ☐ |
Surface appropriately profiled if required | ☐ |
Waterproofing checked in wet areas | ☐ |
Drainage and slope checked | ☐ |
Movement joints identified | ☐ |
Correct adhesive selected | ☐ |
Installation conditions checked | ☐ |
If several items remain unchecked, the floor may not yet be ready for porcelain tile installation.
Common Floor Preparation Mistakes to Avoid
1. Installing over a dirty floor
Even a thin layer of dust can interfere with adhesive bonding.
2. Ignoring cracks
A crack in the substrate should be investigated instead of simply covering it with a tile.
3. Using adhesive to correct major unevenness
Significant substrate variations should generally be corrected during floor preparation.
4. Tiling over wet concrete
Allow the substrate to meet the required curing and moisture conditions before installation.
5. Ignoring existing movement joints
Movement joints serve a purpose and should be incorporated into the tile installation design.
6. Assuming every existing tile floor is suitable
Existing tiles must be firmly bonded, clean and compatible with the proposed installation system.
7. Ignoring floor height
Installing new porcelain over an existing floor can create problems at doors, drains and transitions.
8. Using the same preparation method for every room
A bedroom, bathroom, balcony and commercial entrance can have very different substrate and performance requirements.
How Floor Preparation Changes by Room
Area | Important Preparation Considerations |
Living room | Flatness, cleanliness, substrate stability |
Bedroom | Flatness, cracks and adhesive compatibility |
Kitchen | Cleanliness, moisture exposure and traffic |
Bathroom | Waterproofing, drainage, slope and movement |
Balcony | Waterproofing, drainage, outdoor exposure and movement |
Terrace | Waterproofing, temperature exposure and drainage |
Commercial floor | Structural stability, flatness, traffic and movement |
Outdoor area | Moisture, temperature, drainage and suitable adhesive |
This is why porcelain tile selection and installation should be considered together rather than treating the tile as an isolated product.
Why Porcelain Tiles Are Popular for Dubai Projects
Porcelain is widely used in residential and commercial projects because it can combine durability, low water absorption, design flexibility and relatively easy maintenance.
It can be used across spaces such as:
Living rooms
Kitchens
Bathrooms
Commercial interiors
Hotel spaces
Retail environments
Balconies
Terraces
Outdoor areas
Al Maha Building Materials offers a range of building and finishing materials, including porcelain tiles for residential and commercial applications. Porcelain Tiles from Al Maha Building Materials
For broader project requirements, you can also explore Al Maha Building Materials' categories.
A Simple 7-Step Preparation Process
For a quick reference, the entire process can be simplified into seven stages:
1. Inspect
Understand the existing substrate and identify cracks, movement, moisture and damaged areas.
2. Remove
Remove loose, unstable or unsuitable flooring and contaminants.
3. Repair
Repair cracks, holes, damaged screed and other substrate defects as appropriate.
4. Level and flatten
Correct excessive high and low areas before tile installation.
5. Clean
Remove dust, grease, oil, paint, wax and other bond-inhibiting contaminants.
6. Protect
Install required waterproofing and account for movement joints and drainage.
7. Install
Use the correct adhesive and installation technique for the selected porcelain tiles and project conditions.
Frequently Asked Questions
Can porcelain tiles be installed directly on concrete?
Yes, porcelain tiles can be installed over suitable concrete substrates, provided the concrete is structurally sound, sufficiently cured and dry, clean and prepared according to the adhesive manufacturer's requirements.
Does the floor need to be perfectly level before installing porcelain tiles?
Not necessarily. Some areas require a designed slope for drainage. The more important requirement is that the substrate is suitably flat for the tile format and installation system.
Can I install porcelain tiles over old tiles?
It can be possible when the existing tiles are firmly bonded, clean, stable and compatible with the proposed installation system. Damaged or loose tiles should be addressed first.
How long should new concrete cure before tiling?
The required period depends on the concrete and installation system. As one example, MAPEI specifies at least 28 days for new concrete in a particular porcelain-tile installation procedure. Always follow the requirements of the selected system.
Is waterproofing required below porcelain tiles?
It depends on the application. Bathrooms, showers, balconies, terraces and other water-exposed areas may require a dedicated waterproofing system beneath the tile assembly.
Are large porcelain tiles more difficult to install?
They can require more careful substrate preparation because unevenness becomes more noticeable and achieving adequate adhesive coverage becomes increasingly important. Large-format installations may require back-buttering and specialised installation techniques.
Can floor adhesive compensate for an uneven floor?
Minor variations may be accommodated within the adhesive system's specified application range, but significant unevenness should normally be corrected during substrate preparation rather than relying on inconsistent adhesive thickness.
Final Thoughts
The best porcelain tile installation starts before the first tile is laid.
A clean, stable, sufficiently dry and appropriately flat substrate gives the adhesive a reliable foundation and helps reduce installation problems later.
For Dubai homes, villas, offices, retail spaces and commercial projects, the preparation process should also account for heat, moisture, drainage, movement and the intended use of the floor.
Choosing attractive porcelain tiles is only one part of creating a durable finished floor. Proper substrate preparation, the right adhesive and professional installation all work together to determine the final result.
If you are planning a residential or commercial project, you can explore Al Maha's porcelain tile collection and other building-material categories before finalising your flooring specification. Explore Al Maha Porcelain Tiles
 16 Oct, 2026